A penny alcohol stove is a light weight stove made out of empty soda or beer cans. They can be used as a way to boil a small amount of food at a time. They are so light and small that they can be carried in a backpack or bug out bag with absolutely no trouble. They don't create a large flame or much smoke which attract attention and they will boil about a cup of water in less then 5 minutes. While that may not seem like much it is enough to cook soup or purify water.
There are all kinds of directions for making the stoves on the Internet and you tube. For some reason I LOVE these little stoves. They're easy and fun to make and use. Below are the directions for one version which I've made.
For supplies you will need:
a fresh box cutter razor blade
A sharpie pen
A pair of scissors
A push pin
Two empty soda or beer cans
A book about 2.5 inches thick (I used the phone book)
A straight edge
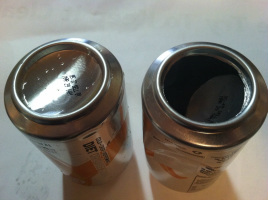
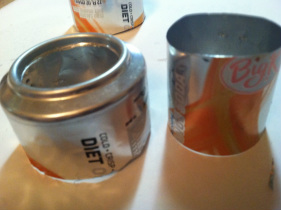
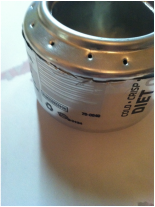
First, look at the bottom of one of the empty cans. You will see a round indention. Carefully follow the edge of the indention with the box cutter making several scores all the way around. This is the hardest part. Be careful and keep going around the same cut until the bottom is easily popped out of the can. Now you will have two cans (see the picture) and one will have the bottom removed.
There are all kinds of directions for making the stoves on the Internet and you tube. For some reason I LOVE these little stoves. They're easy and fun to make and use. Below are the directions for one version which I've made.
For supplies you will need:
a fresh box cutter razor blade
A sharpie pen
A pair of scissors
A push pin
Two empty soda or beer cans
A book about 2.5 inches thick (I used the phone book)
A straight edge
First, look at the bottom of one of the empty cans. You will see a round indention. Carefully follow the edge of the indention with the box cutter making several scores all the way around. This is the hardest part. Be careful and keep going around the same cut until the bottom is easily popped out of the can. Now you will have two cans (see the picture) and one will have the bottom removed.
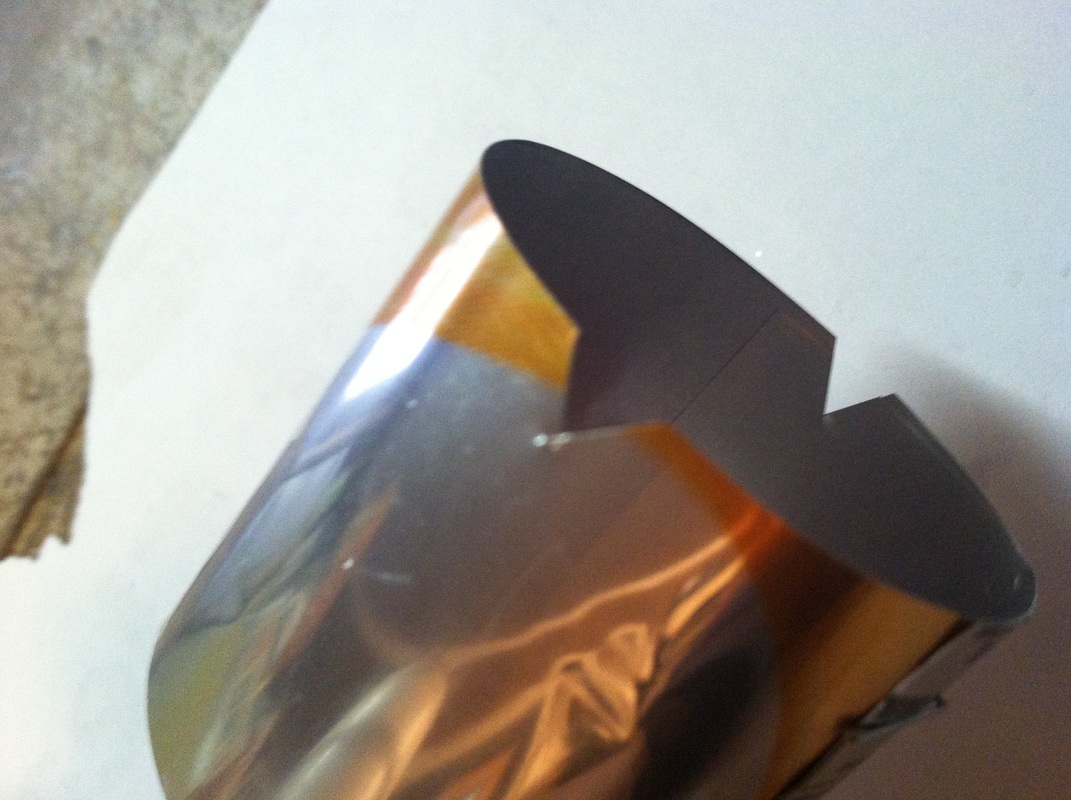
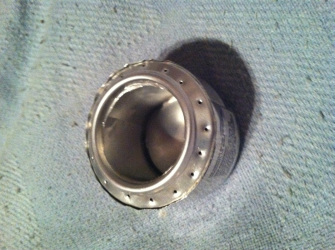
Next, you will need to cut both cans all the way around. To do this I lay a book down and place the box cutter on the top with the sharp edge just over the edge of the book and hold firmly. Now place the can right side up and against the edge of the book where you have the razor. Begin turning the can cutting the bottom off with the razor as you turn. It may take several turns to cut all the way through but you will get a nice clean cut. Remove the bottom of both cans this way. You should end up with two bottoms about 2.5 inches tall (the height of the book). One can will be the one with the center cut out and one will be solid. (picture 2)
Next you will need to slightly stretch one of the can bottoms which you have just cut. Take a third can that has not been cut and gently push it into the cut can with the SOLID bottom. Twist it around carefully to slightly stretch the solid bottomed can. This step will make it easier to push the two bottoms together when forming the stove.
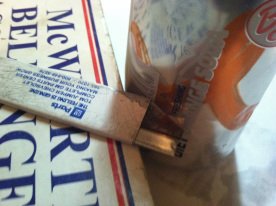
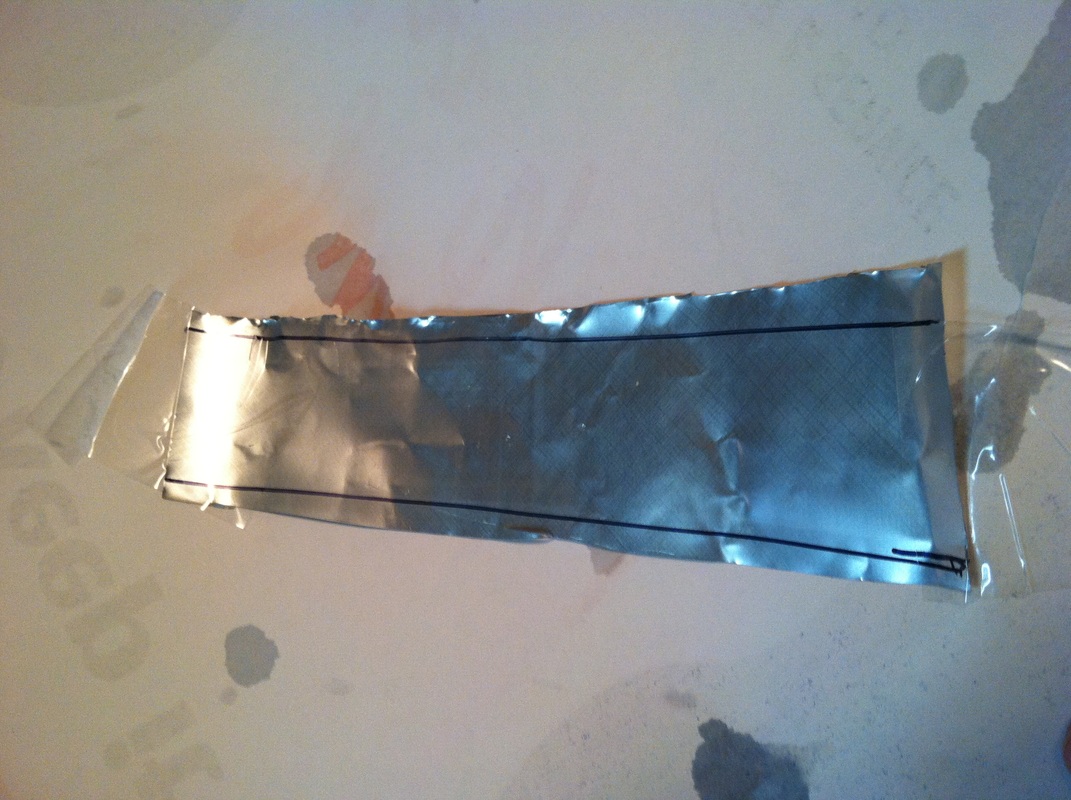
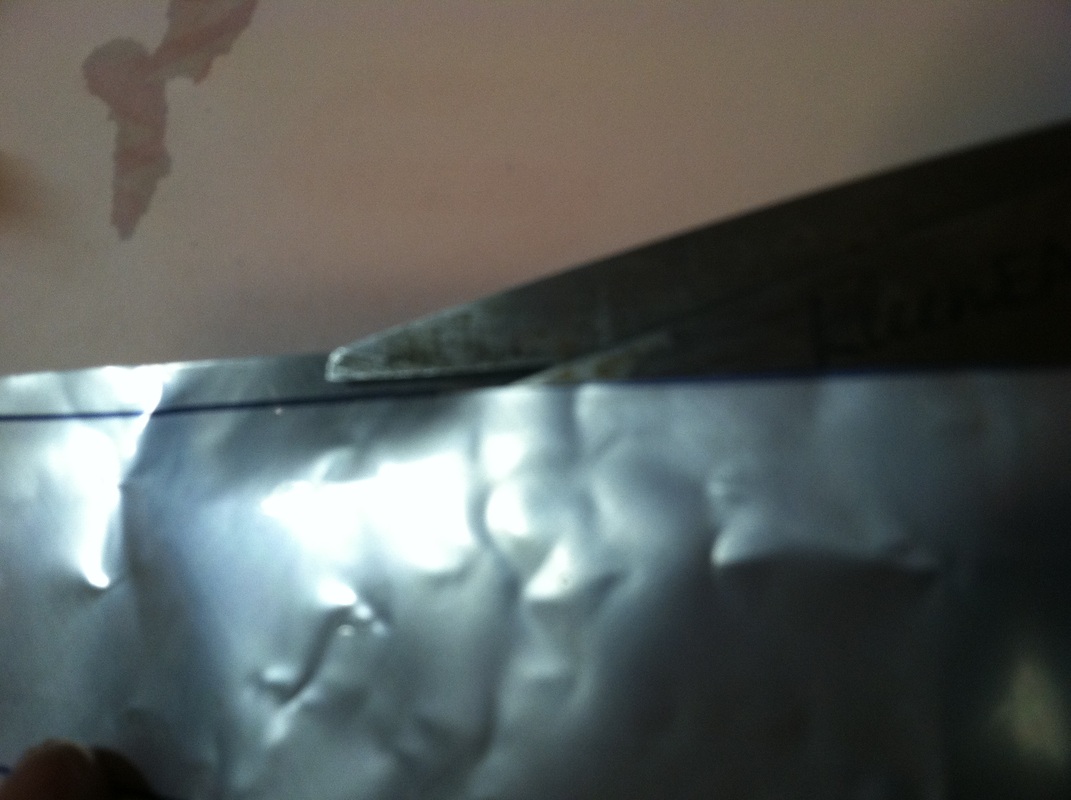
Next take the top portion of one of the cans that you cut away from the bottoms. Make a straight cut up the side of the can with the scissors. Now cut around the top of the can until you have removed a strip of aluminum. You will use this strip to form the inner double wall of your stove. Lay the strip out flat and use your straight edge to draw your cutting lines with the sharpie pen. You want to cut the strip about 1/4 inch wider then the height of your can bottoms. (Picture 3 and 4)
Next take the top portion of one of the cans that you cut away from the bottoms. Make a straight cut up the side of the can with the scissors. Now cut around the top of the can until you have removed a strip of aluminum. You will use this strip to form the inner double wall of your stove. Lay the strip out flat and use your straight edge to draw your cutting lines with the sharpie pen. You want to cut the strip about 1/4 inch wider then the height of your can bottoms. (Picture 3 and 4)
| 
|
Now that you have your strip cut out it will naturally want to coil back up. Let it form a coil the size of the ring inside the bottom of the solid bottomed can. (Picture 5)
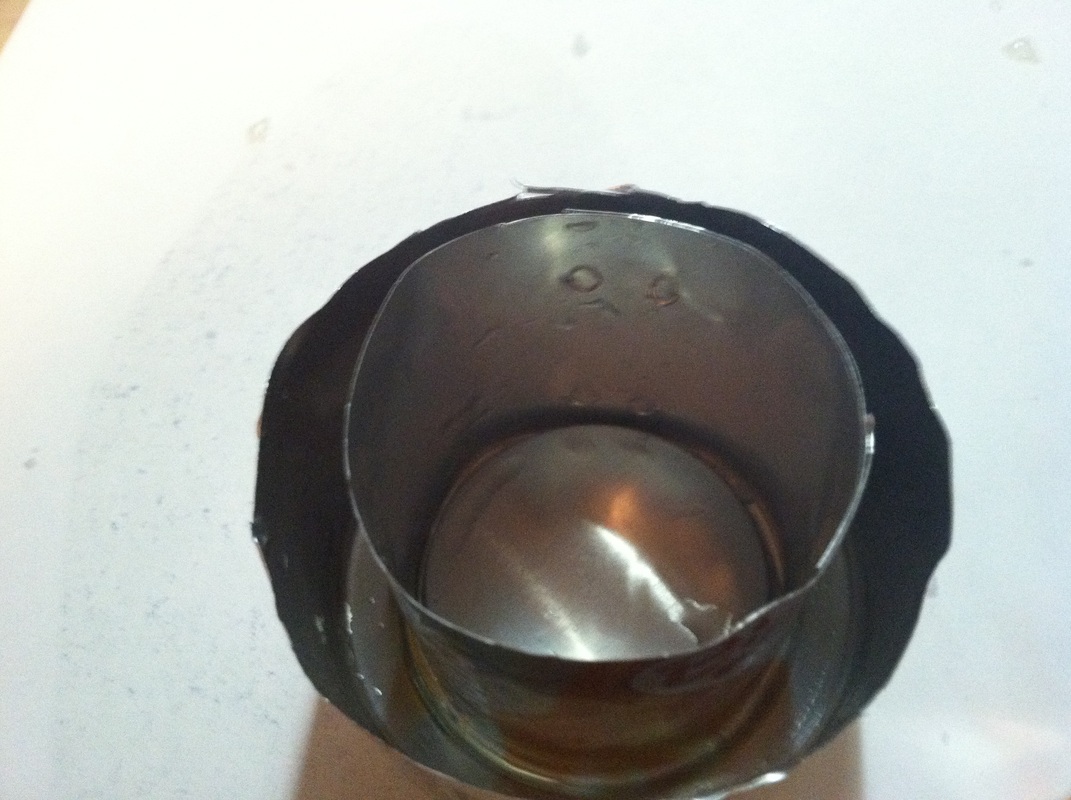
When you have the strip coiled to the right size then place two staples in the coil to make it hold its shape. Now cut two small notches on opposite sides of one bottom edge of the coil. These will let the fuel come through. (Picture 6)Next, place the coil inside the solid bottomed can with the notches on the bottom. Then invert the can bottom that has the hole and insert it INSIDE the solid bottomed can with the coil between the two bottoms. (Picture 7)
| 
|
Make sure that the coil stays in place forming the inner wall of the can. Carefully press the two cans together until they create a snug fit. Your stove is almost finished. All you need to do is make the flame holes around the rim of the stove.
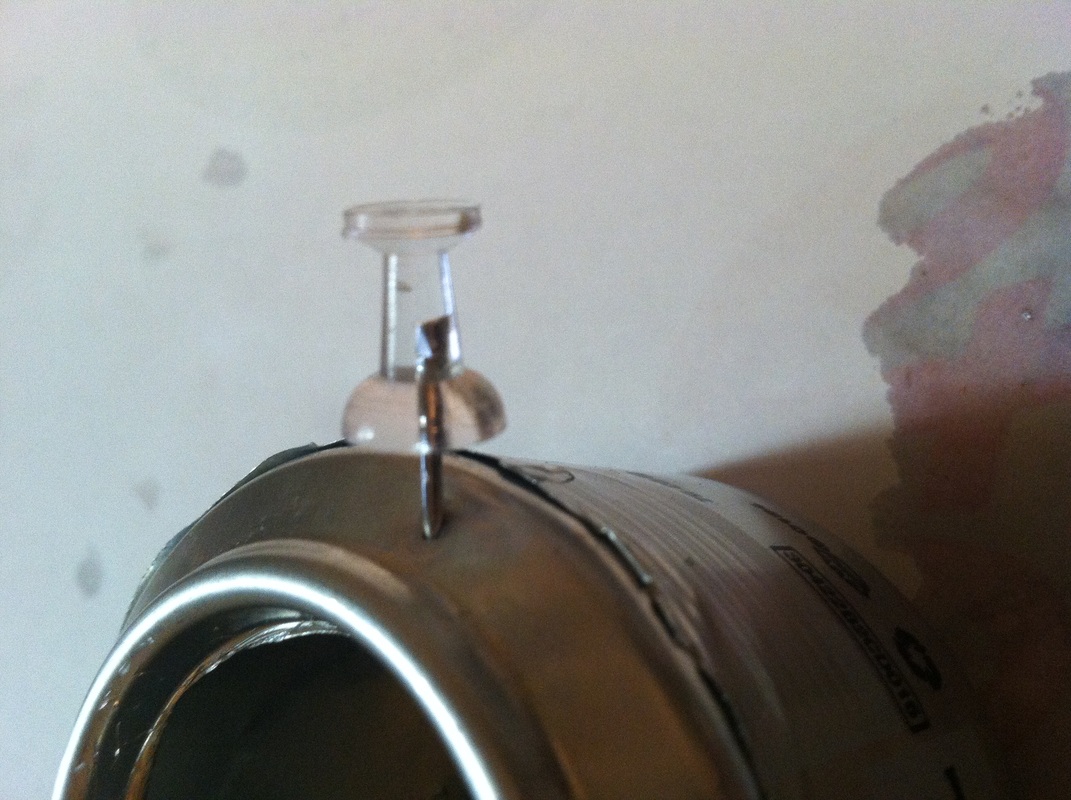
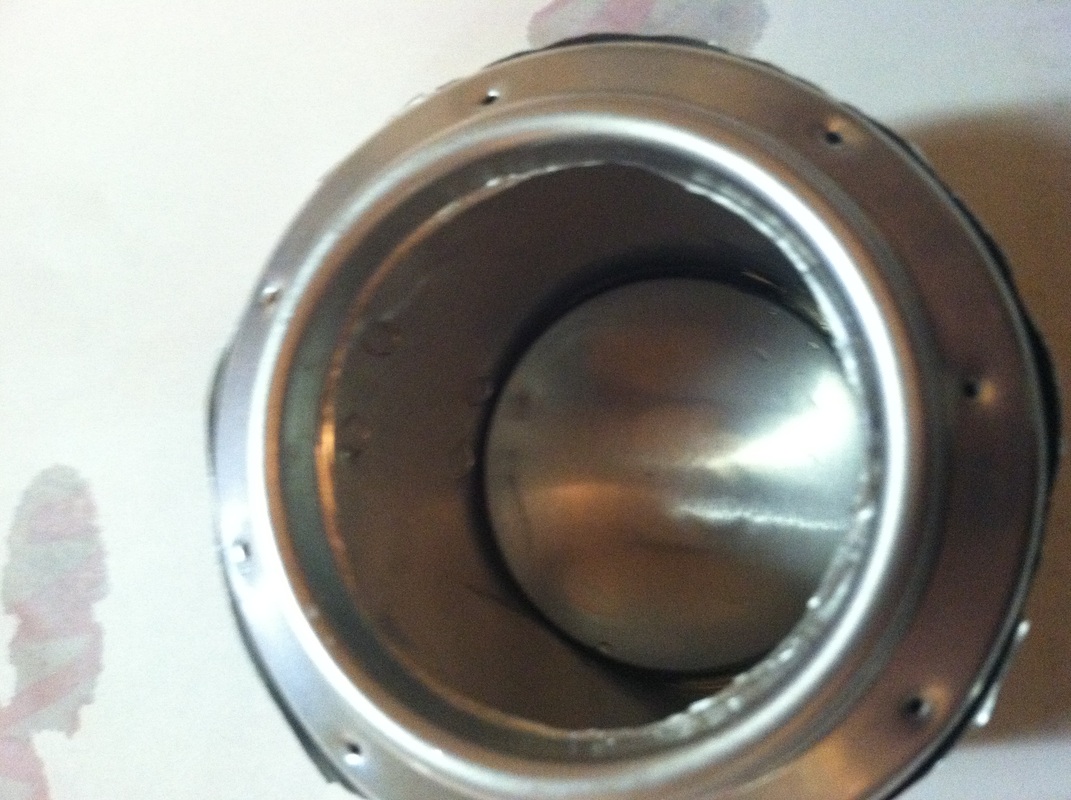
Use the push pin to make two holes directly across from each other on the rim of the open edge. Now make two more holes on the other two sides. You will make a total of 16 holes in the same manner. Directly in the center of two of the holes make anther hole. Continue until you have added a hole equal distances between the original 4 holes. You now have 8 holes. Continue splitting the distance two more times until you have 16 holes equal distances around the edge of the stove.
Use the push pin to make two holes directly across from each other on the rim of the open edge. Now make two more holes on the other two sides. You will make a total of 16 holes in the same manner. Directly in the center of two of the holes make anther hole. Continue until you have added a hole equal distances between the original 4 holes. You now have 8 holes. Continue splitting the distance two more times until you have 16 holes equal distances around the edge of the stove.
| 
|
That's it. Your stove is finished. You will add about 2 ounces of fuel to the center opening. Most people use HEET fuel additive in the yellow bottle but you can use rubbing alcohol or denatured alcohol if you prefer. Light it with a long lighter and wait for the flames to form around the push pin holes which you made. It will have a bigger flame at first but eventually die back until it is just coming out of the pin holes. You are now ready to cook with your stove. Add a grate or use it with a fold up stove. An empty tin can with vent holes will make a grate to raise your pot off of the flame. You can also just use bricks or rocks to form a u shaped place to sit the stove and provide a place to rest the edge of your pot. The little stove is very handy and can be used in many different applications to provide a lightweight portable stove.
Southern Wood Elf.
 RSS Feed