The recipes here are the two meals that I prepared while camping. On day two, I cooked breakfast and supper. For breakfast I cooked a pioneer journey cake in the dutch oven. It is called a pioneer cake because it contains no milk or eggs and would have been made by people with dried storable goods perhaps in a wagon train. I used butter BUT it can be made with lard or tallow as well which would change the flavor a bit but perhaps be more available on a wagon train. Some pioneers took their cows with them tied behind the wagon so some people would have had both milk and butter. Some also took a cage of chickens so its possible eggs were there to be had but might be put to better use since this recipe doesn't include them. We didn't bring a cow along with us but we did bring some cream which we made into butter in a mason jar while we were sitting at the campsite the first evening. (Directions for making butter in a jar are in a previous post.) The original recipe calls for dried apples and a tsp of cinnamon. I have tried it with other dried fruits and it works just as well. I chose to use cranberries and raisins this time. I also used allspice, nutmeg and cloves instead of the cinnamon.
For supper we had my own recipe for shrimp and FRIED grits. In order to fry grits they have to be previously cooked and placed in a container to chill. After they firm up in the container then they can be sliced for frying. I don't eat quick grits. I also prefer yellow grits to white grits. I learned years ago that the secret to creamy, quicker cooking stone ground yellow grits is to SOAK them the night before and stone ground need to be rinsed before soaking. Before bed on our first day of camping I poured a mixture of milk and water in a small pot. I poured in grits just until they peaked in the center. Then I stirred, put the lid on and sat the pot of uncooked grits in the truck overnight. When I got up I put the grits on the camp stove and added some more water to replace what had been absorbed by the grits overnight. Then I cooked the grits on low adding only salt while I prepared the rest of breakfast. When done we had some with breakfast and the leftovers were packed in a straight sided wide mouth canning jar for supper.
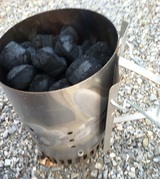
Here are the recipes and directions for the pioneer cake which we had for breakfast. Get coals started in a charcoal chimney.
For supper we had my own recipe for shrimp and FRIED grits. In order to fry grits they have to be previously cooked and placed in a container to chill. After they firm up in the container then they can be sliced for frying. I don't eat quick grits. I also prefer yellow grits to white grits. I learned years ago that the secret to creamy, quicker cooking stone ground yellow grits is to SOAK them the night before and stone ground need to be rinsed before soaking. Before bed on our first day of camping I poured a mixture of milk and water in a small pot. I poured in grits just until they peaked in the center. Then I stirred, put the lid on and sat the pot of uncooked grits in the truck overnight. When I got up I put the grits on the camp stove and added some more water to replace what had been absorbed by the grits overnight. Then I cooked the grits on low adding only salt while I prepared the rest of breakfast. When done we had some with breakfast and the leftovers were packed in a straight sided wide mouth canning jar for supper.
Here are the recipes and directions for the pioneer cake which we had for breakfast. Get coals started in a charcoal chimney.
Cream together
1.5 cups of sugar
3/4 cup butter
Mix in
2.5 cups apple cider
Add
1 tsp baking soda
1 tsp nutmeg
1 tsp allspice
1 tsp cloves
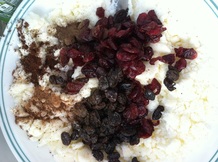
1/2 cup chopped dried fruit. ( I used raisins and cranberries this time but dried apples are great too.)
1.5 cups of sugar
3/4 cup butter
Mix in
2.5 cups apple cider
Add
1 tsp baking soda
1 tsp nutmeg
1 tsp allspice
1 tsp cloves
1/2 cup chopped dried fruit. ( I used raisins and cranberries this time but dried apples are great too.)
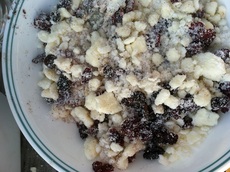
Blend in 4 and 1/2 cups flour
Beat well by hand until batter is well mixed.
Beat well by hand until batter is well mixed.
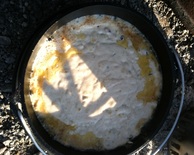
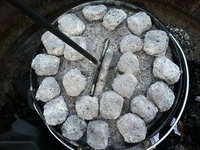
Prepare dutch oven by placing 11 coals on the bottom and adding a dollop of butter to melt. Place 18 coals on the lid and put on Dutch oven. When butter is melted and the batter is mixed then remove lid and lift oven to spread the butter on bottom and sides of oven. Then pour batter into hot dutch oven ( it sizzles) cover with lid and coals and allow to bake for 25-30 minutes until skewer poked in center comes out clean.
| 
|
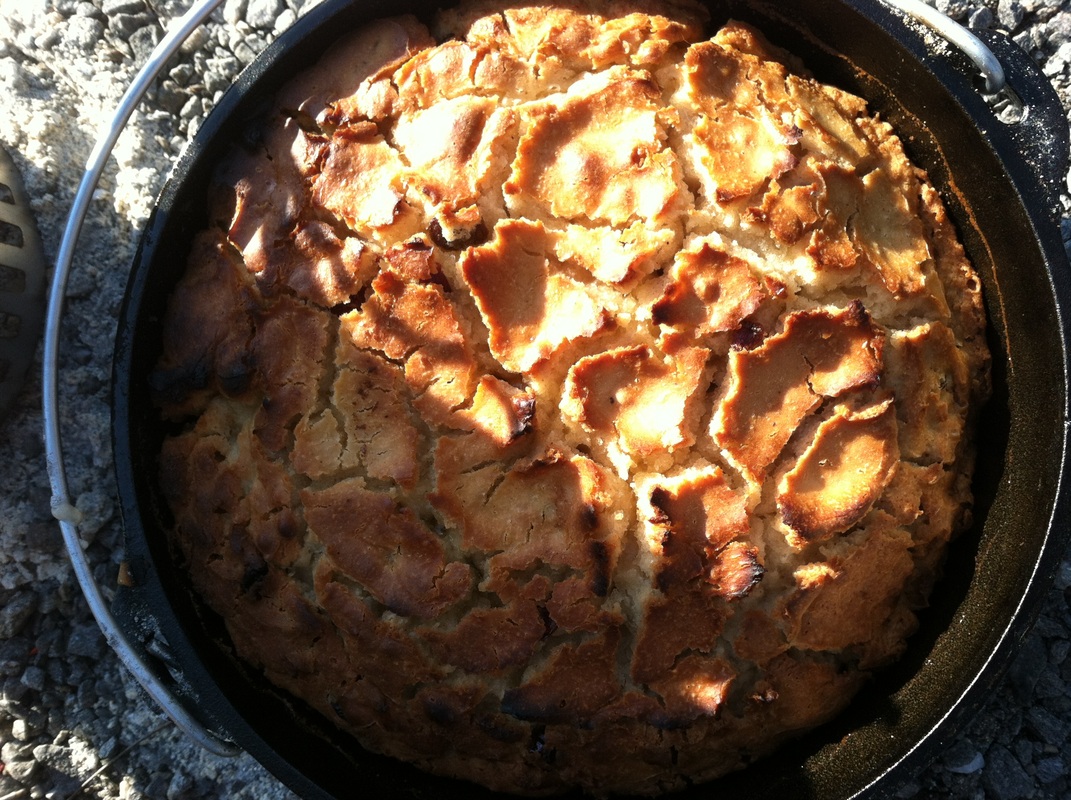
Here is the finished journey cake.
| 
|
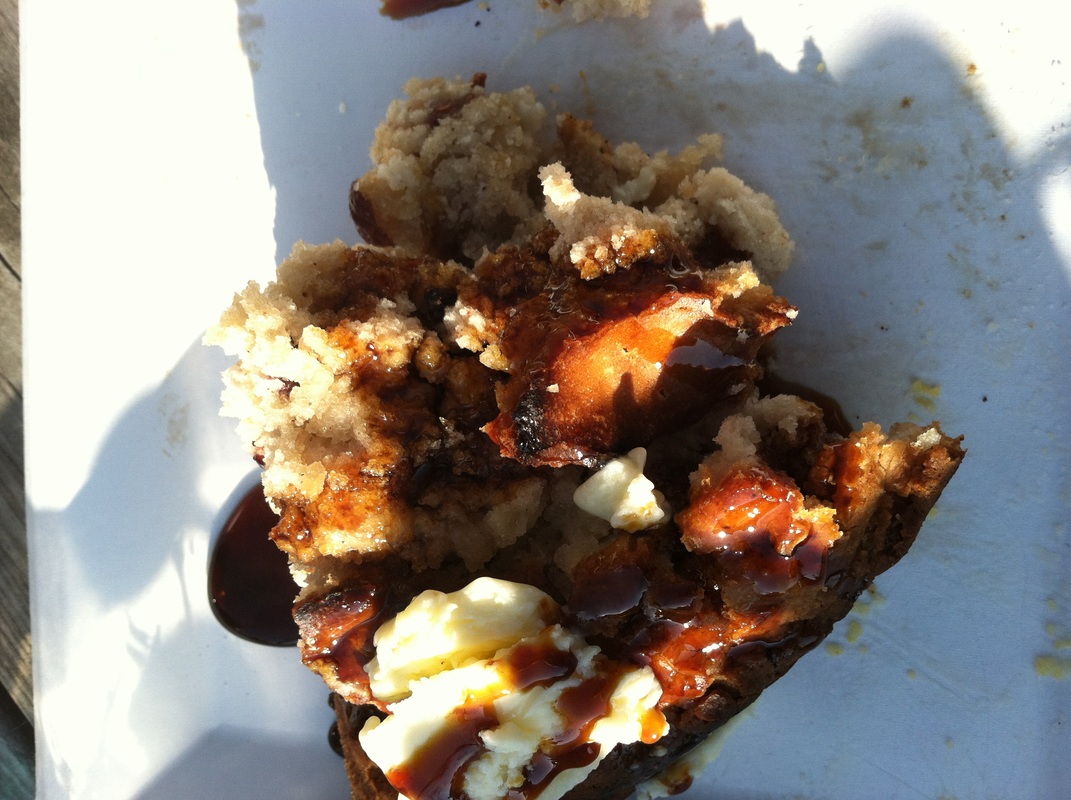
After it cools for ten minutes, it is served warm from the Dutch oven and topped with fresh butter and a generous drizzle of molasses. It is more like a quick bread then a cake. It isn't as sweet as cakes that we make now. We also had some sausage links and some of the grits to go with it.
Day two supper shrimp and grits:
For supper on day two (after the fair) I made my own version of shrimp and grits. Some people make shrimp and grits with cheese grits and shrimp in a "Tasso" gravy. For my version I include peppers and onions as well as kielbasa sausages. I also FRY the grits rather then having them in a bowl.
Before leaving for our trip I gathered some edible "weeds" from the garden to make a green salad. I picked chicory, clover, wood sorrel, henbit, wild geranium and dandelion greens. For our supper I washed and mixed the greens and dressed them with a vinegrette made with red wine vinegar and olive oil. I added salt, pepper, a pinch of sugar, and dried basil and used it to dress our mixed greens. I also tossed in some of the cranberries that were left over from the journey cake.
Before cooking anything I got all my ingredients ready. The actual cooking process is easy and quick.
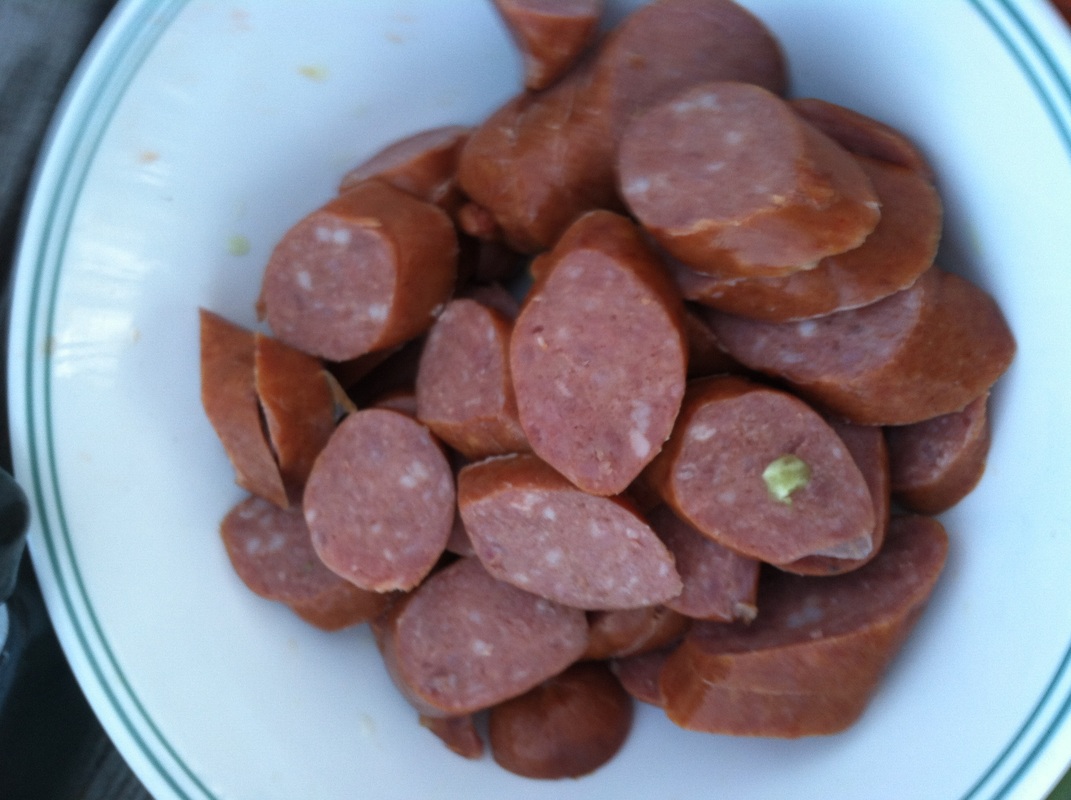
I sliced the kielbasa.
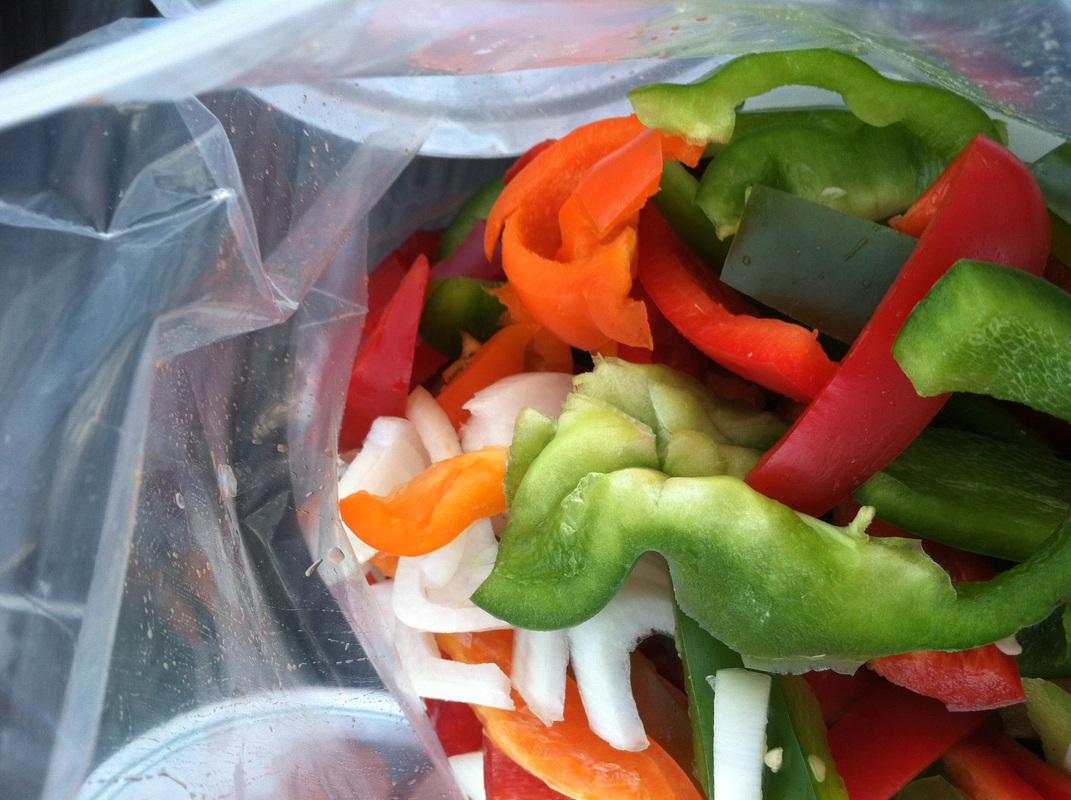
Then I sliced green, yellow and red peppers. I also sliced some sweet onions. I mixed all the vegetables together and set them aside.
Day two supper shrimp and grits:
For supper on day two (after the fair) I made my own version of shrimp and grits. Some people make shrimp and grits with cheese grits and shrimp in a "Tasso" gravy. For my version I include peppers and onions as well as kielbasa sausages. I also FRY the grits rather then having them in a bowl.
Before leaving for our trip I gathered some edible "weeds" from the garden to make a green salad. I picked chicory, clover, wood sorrel, henbit, wild geranium and dandelion greens. For our supper I washed and mixed the greens and dressed them with a vinegrette made with red wine vinegar and olive oil. I added salt, pepper, a pinch of sugar, and dried basil and used it to dress our mixed greens. I also tossed in some of the cranberries that were left over from the journey cake.
Before cooking anything I got all my ingredients ready. The actual cooking process is easy and quick.
I sliced the kielbasa.
Then I sliced green, yellow and red peppers. I also sliced some sweet onions. I mixed all the vegetables together and set them aside.
| 
|
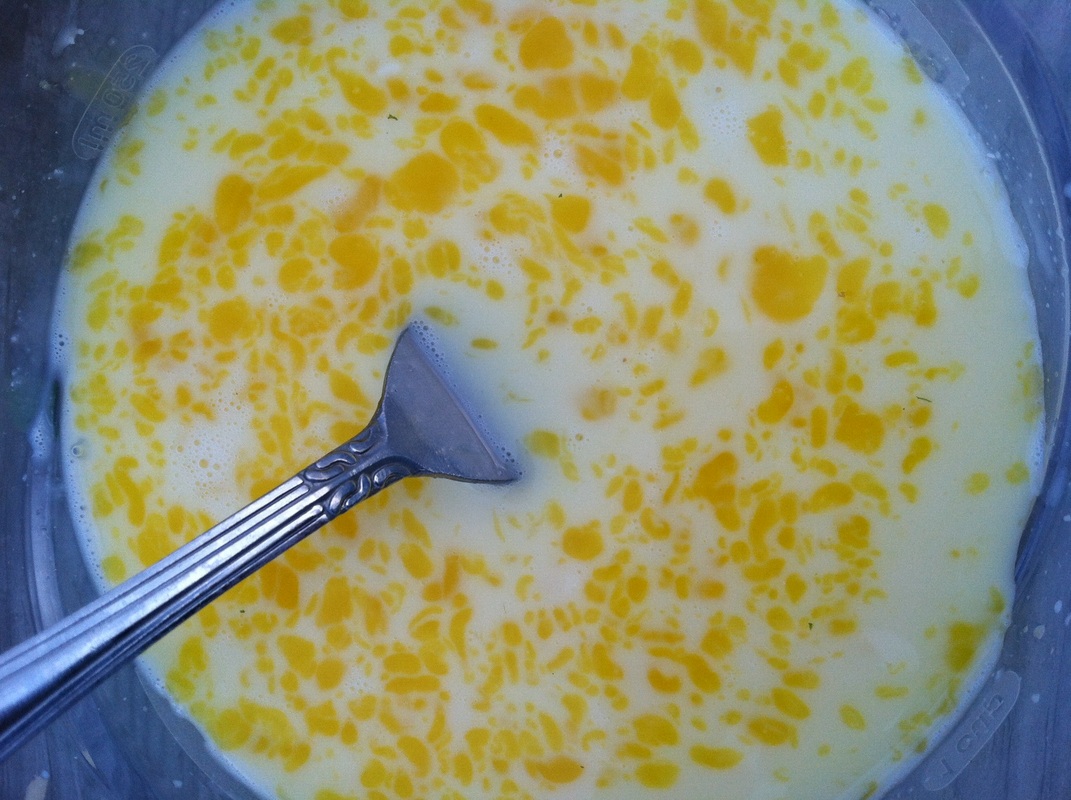
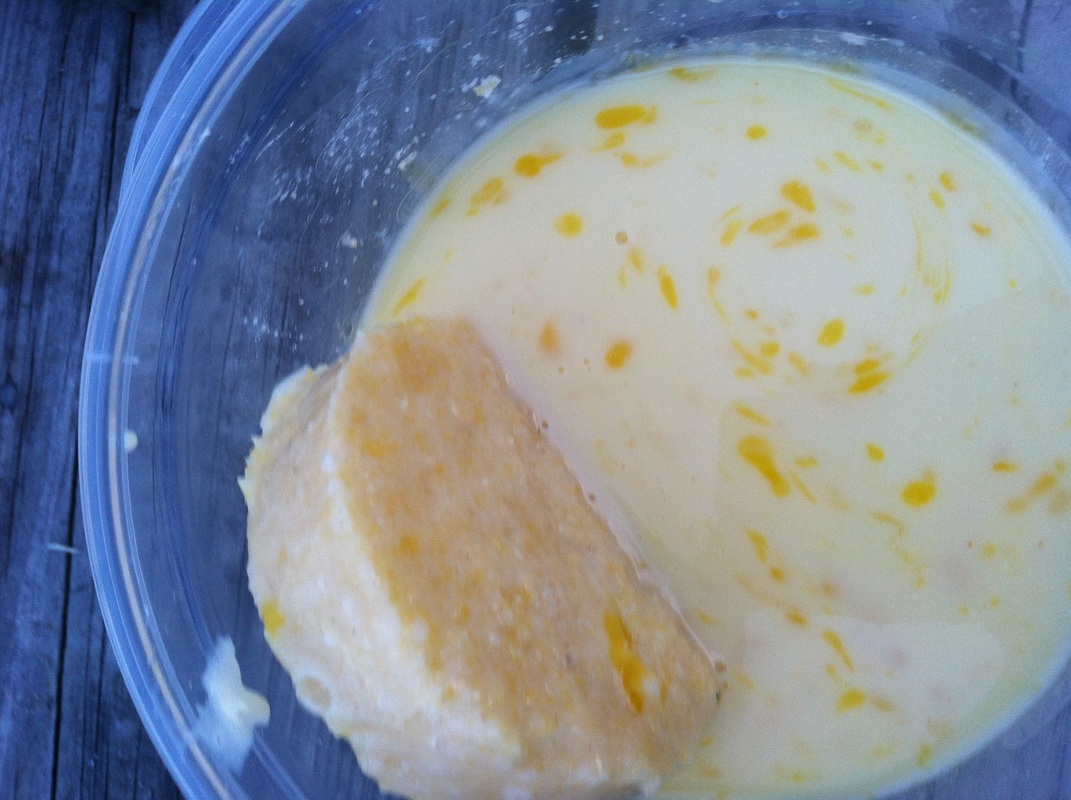
Next I whisked two eggs and some milk together in one bowl.
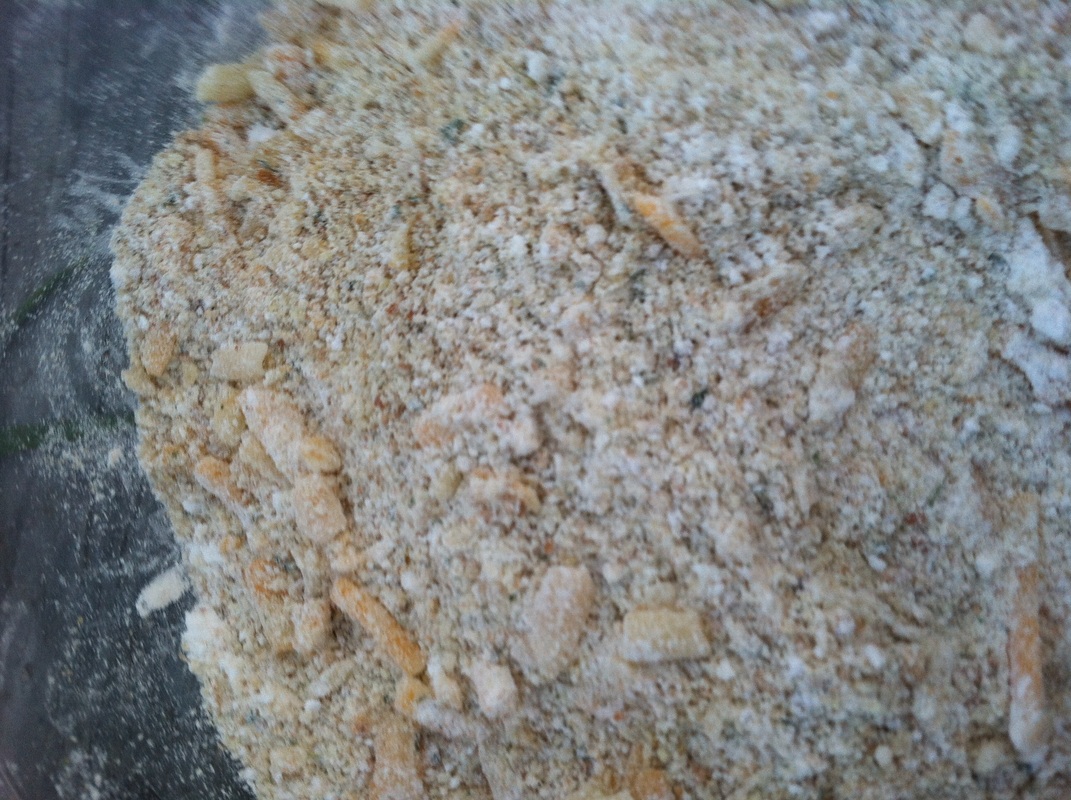
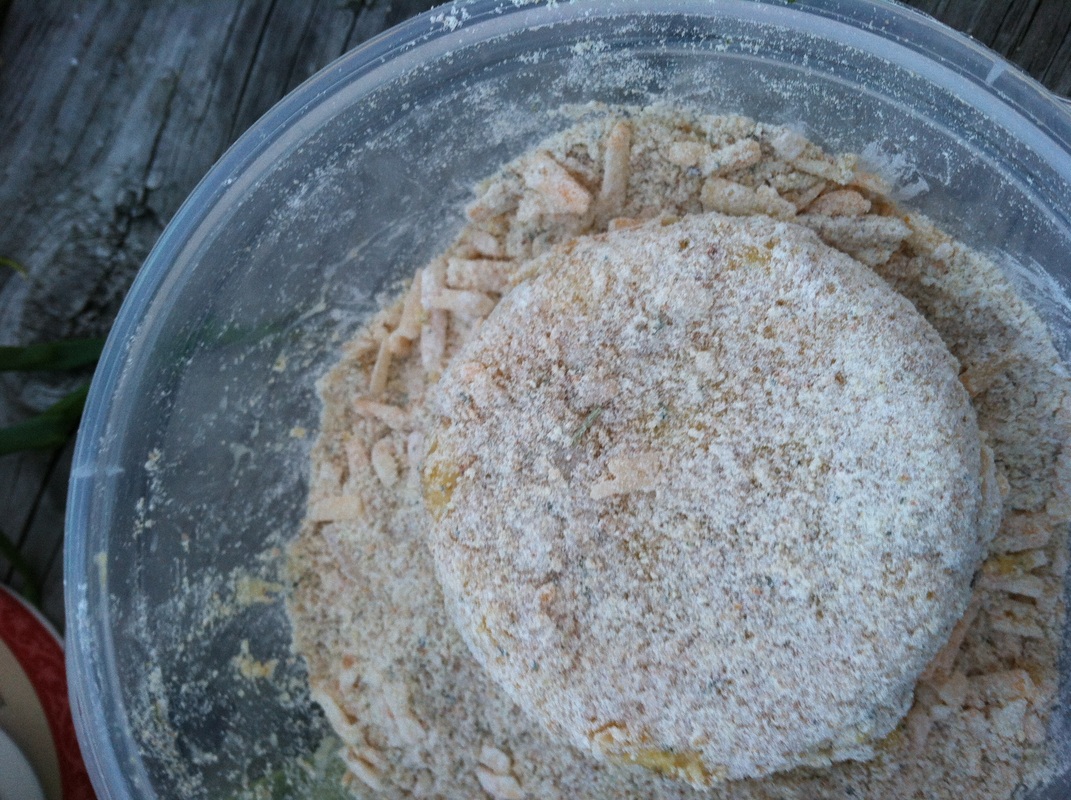
In another bowl I grated some Parmesan and Colby Jack cheese. To the cheese. I added bread crumbs and some flour for the coating. Them I always add a dash of salt and pepper and mix everything together.
In another bowl I grated some Parmesan and Colby Jack cheese. To the cheese. I added bread crumbs and some flour for the coating. Them I always add a dash of salt and pepper and mix everything together.
| 
|
Next I removed the grits from the jar (or pan) and sliced into rounds (or triangles or rectangles depending on what you molded them in).
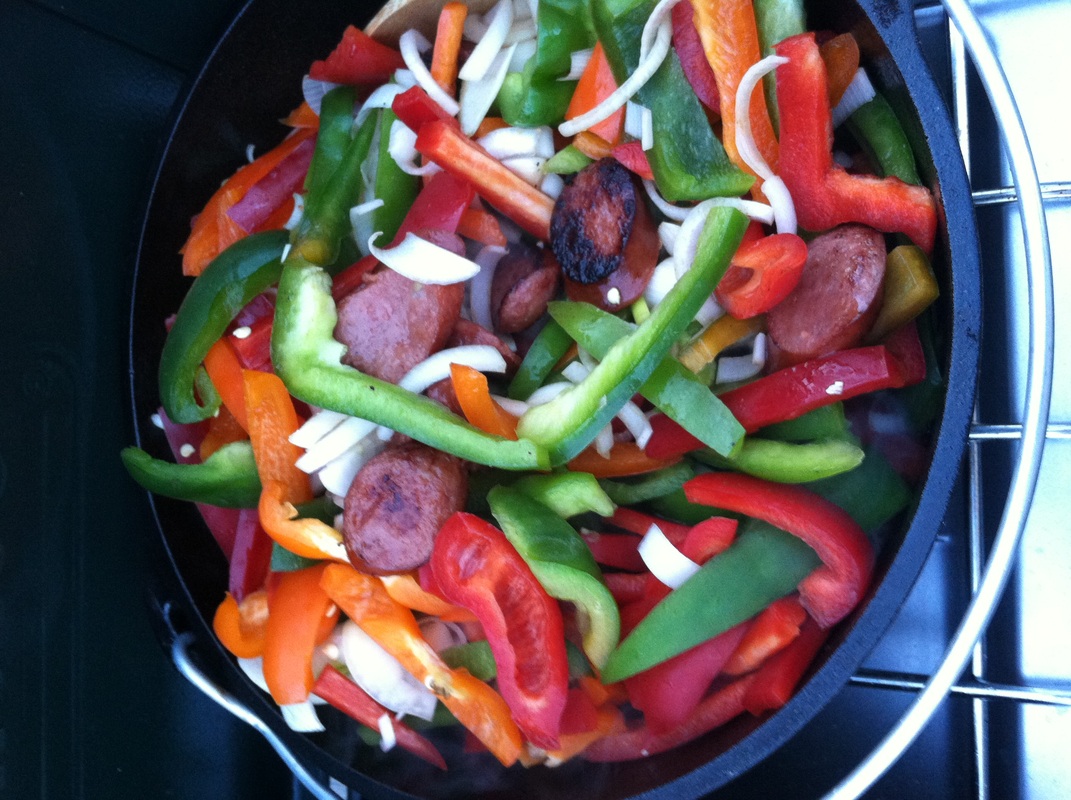
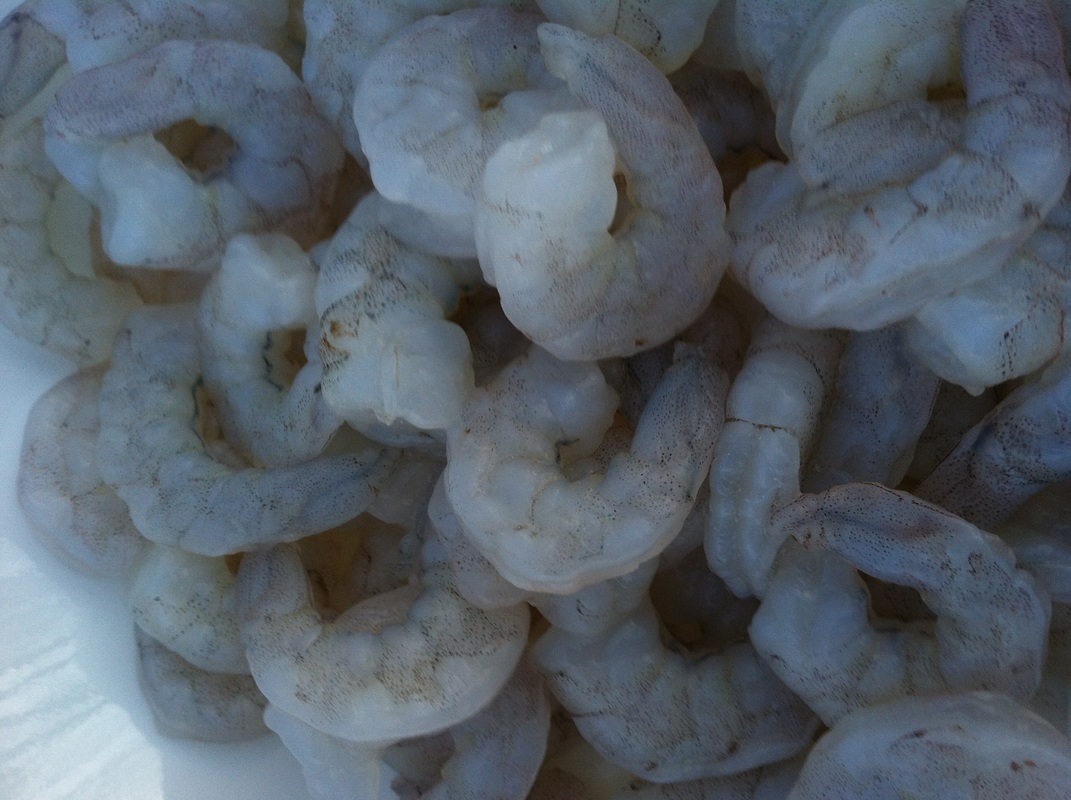
I started by browning the kielbasa in the Dutch oven. When it was done I added the vegetables and some old bay seasoning. Stirred it around until the vegetables were beginning to cook but not yet soft. When they were at the proper consistency I added the shrimp and stirred them into the hot mixture for about a minute. Then I put the lid on and turned the heat off. It will finish cooking in the Dutch oven with no additional heat while I fry the grits.
I started by browning the kielbasa in the Dutch oven. When it was done I added the vegetables and some old bay seasoning. Stirred it around until the vegetables were beginning to cook but not yet soft. When they were at the proper consistency I added the shrimp and stirred them into the hot mixture for about a minute. Then I put the lid on and turned the heat off. It will finish cooking in the Dutch oven with no additional heat while I fry the grits.
| 
|
Dip the grits rounds into the egg wash.
Then coat them in the breadcrumb and cheese mixture.
Then coat them in the breadcrumb and cheese mixture.
| 
|
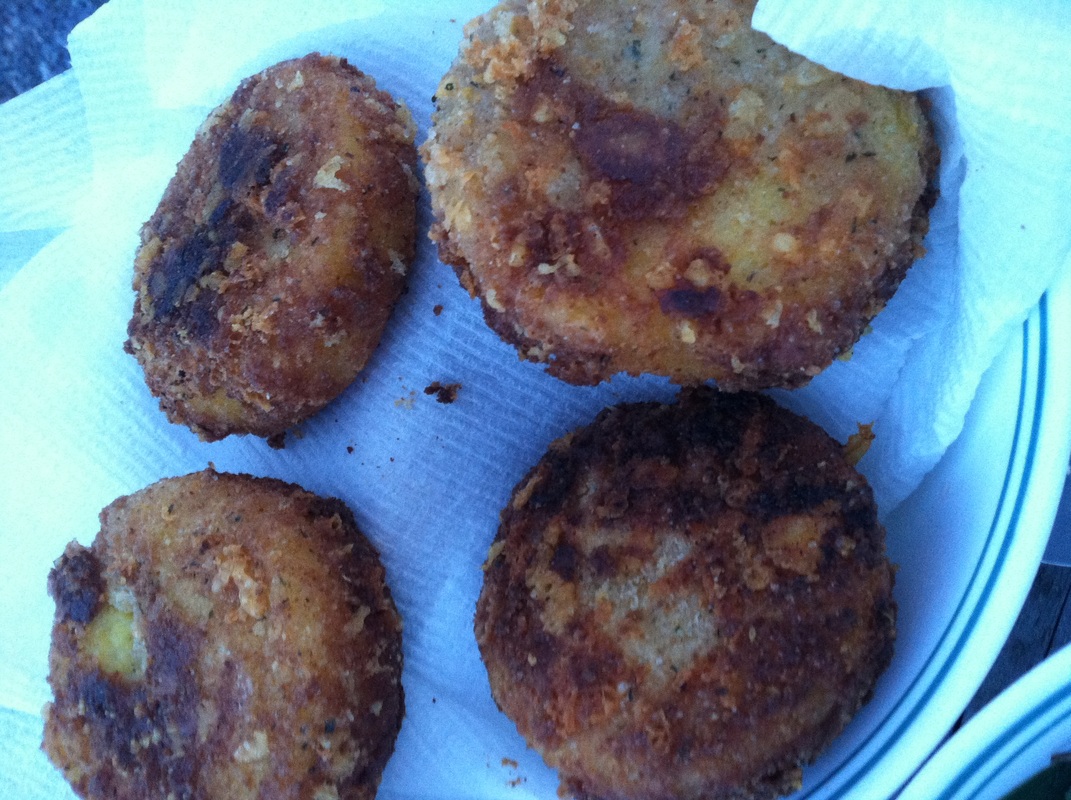
Add frying oil to a cast iron skillet and when it reaches the proper temperature add the coated grits. Fry gently on one side until golden. Flip over and fry the other side. When done remove from oil and place on a towel lined plate.
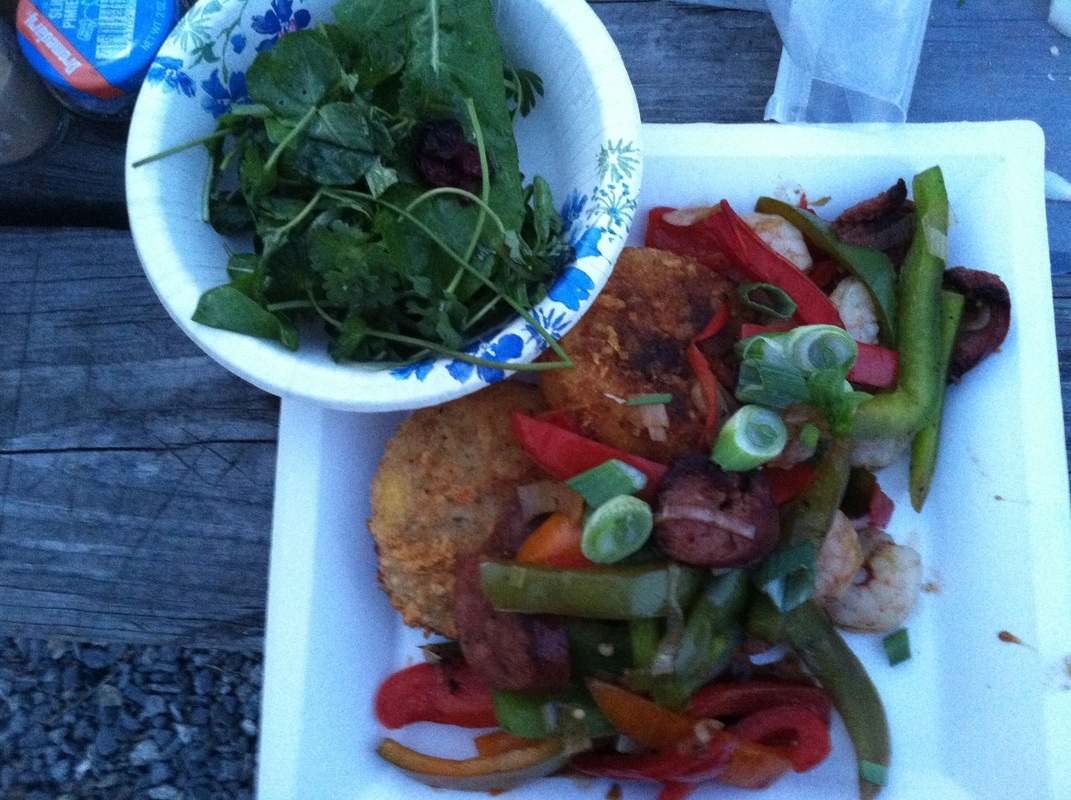
Serve the grits by topping with the now finished shrimp mixture and the green salad. I garnished with slices of fresh green onion. You can add some more grated cheese if you like as well but I didn't. Here is the meal ready to eat. It was wonderful if I do say so myself and I almost never brag on my own cooking:) The grits are crunchy brown on the outside and creamy on the inside.
Serve the grits by topping with the now finished shrimp mixture and the green salad. I garnished with slices of fresh green onion. You can add some more grated cheese if you like as well but I didn't. Here is the meal ready to eat. It was wonderful if I do say so myself and I almost never brag on my own cooking:) The grits are crunchy brown on the outside and creamy on the inside.
| 
|
I hope that you get inspired to try a little dutch oven cooking as well as other outdoor cooking. You might even try these recipes. I promise you won't be disappointed. If they Include ingredients you don't like then change them to make them yours. Leave out the shrimp or the kielbasa. Leave out the onions or peppers or use completely different vegetables like squash. Add a hot pepper if you prefer spicy. Or just cook the grits and serve as a side dish all on their own. When I do them as a simple side dish I change the spices in the coating to add a little zing to the grits. The journey cake can be changed as well by changing the dried fruit or adding nuts. Whatever you do, just get out there and build a fire or a chimney full of coals and learn something new. Learning a skill and having fun is what its all about.
Southern Wood Elf
Southern Wood Elf
 RSS Feed